
A bathroom vent fan not only removes bad odors but it also helps to prevent moisture issues that cause mold in bathrooms, steamy mirrors and foggy windows. You can replace a bathroom vent fan for 50$ to 150$ or in some cases your fan just needs to replace some of its parts for about 25$ to 50$. But only when, if your fan housing is in a good condition or if the fan does not have any visible damage. Let’s explore the step by step guide regarding, How to replace a bathroom vent fan in an easy way?
Signs That Your Bathroom Vent Fan Have To Be Replaced And Its Importance
- When you notice that your bathroom vent fan;
- Makes a noisy or irritated sound
- Leaves your mirror steamy or bathroom with a stinky odor
- Reduced speed or efficiency of the fan
- Any visible damage on fan
So it means your fan needs replacement. Replacing a bathroom vent fan gives your bathroom a fresh indoor air quality and helps to reduce moisture related problems such as mildew and mold growth.
Types of vent fans that you should choose for your bathroom are wall mounted bathroom vent fan, ceiling mounted vent fan or inline vent fans.
Considerations Before Starting:
1. Switch off the power supply to your fan before starting any procedure.
2. Make sure to wear safety eye goggles, gloves and mask to protect you from any debris, dust or mold droppings.
3. If you do not have the permit for the existing vent fan then apply for a new permit. Go to your local permitting office to apply.
4. Lay down an old or dirty cloth on the floor of the bathroom to protect the tiles from any dirt or debris dropping.
5. If you’re installing a new vent fan, then we’ll have suggested you, to make a duct hole on the outside sidewall. Because it is necessary to open the exhaust portion of the fan in the outside area, not in an enclosed area, crawl space or attic.
Tools You’ll Need:
- Screw driver
- Measuring tape
- Step ladder (if needed)
- Circuit tester
- Old cloth
- Wire connector
- Drill / Driver
- Duct tape
- Jigsaw (if need to adjust the shape of ceiling for new exhaust fan)
- Extension ladder (for duct hole)
- Safety goggles, mask
- Flashlight
How to Remove an Old Bathroom Vent Fan?
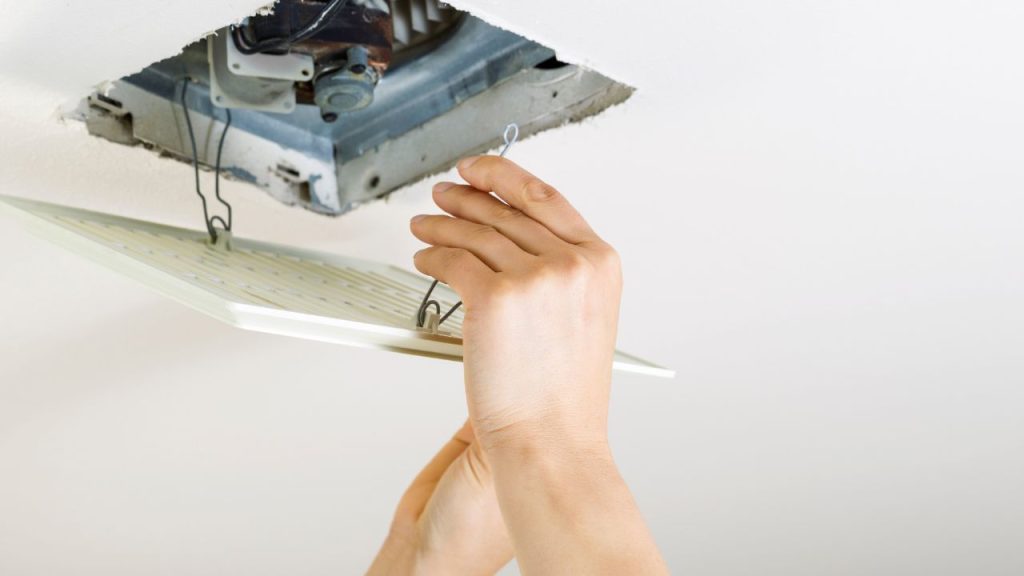
Step# 1 Switch off the Power Supply:
Turn off the electricity supply to the bathroom vent fan before starting any step.
Step# 2 Remove the fan Grill / Cover:
Some fans are secured by screws to the place. So inspect any screw on the fan cover, if you see unscrew it with a screwdriver, if you don’t see any screw, take a flat screwdriver and pry at the edge of the fan grill to remove the fan cover.
Step# 3 Disconnect the Fan Wiring:
Remove the connection of wiring of the fan by disconnecting the wire from the housing of the fan or from the plastic connector, if you see the wires leading out from it.
Step# 4 Detach the Vent / Duct Pipe:
Usually the vent/duct pipe connects with the housing of the fan by tape, screw or clip. If the vent pipe is attached by the duct tape then peel it off from the housing duct hole, but if the pipe is attached by screw, remove this as well by using a screwdriver.
Step# 5 Take Out the Housing:
After removing every connection from the housing, take out the housing of the bathroom vent fan from the ceiling or wall.
How to Install a New Bathroom Vent Fan?
Step# 1 Prepare the Ceiling Hole for installation:
- First clean the area properly for the new fan installation. Then measure the new exhaust fan with the hole by measuring tape or put the fan housing on the ceiling for measuring.
- If your fan is larger than the ceiling hole, mark the ceiling from where it needs to be cut, adjust the hole by using a jigsaw, drywall knife or reciprocating saw to enlarge the opening.
- Also you can install the small housing if your ceiling is larger from the new fan, you can patch the ceiling drywall to cover the extra space.
Step# 2 Place the Fan Housing on the Ceiling Hole:
- Read the instructions that came with your fan kit to make sure the exact secured way your fan requires.
- Make sure you have someone to help you by holding up the fan housing, while you secure it with screws or brackets from the bathroom or inside from the attic.
- If your fan requires you to attach screws from below, secure the position of fan housing on the ceiling hole by attaching the screws or brackets with the wall through a drill or screwdriver on the given holes in fan housing.
- But if your fan housing needs to be secured from the above side, then go to your attic, drive the screws or brackets into your fan housing holes until it is securely placed in its position.
- If your fan has holes for brackets to hold from above, or screws to go through the ceiling, use both.
Step# 3 Connect the Vent/Duct Pipe with Housing:
- If your existing vent pipe is in good condition then you can use the same vent pipe or if not then change it with the new one to connect it with fan housing.
- After attaching the pipe with housing, wrap the layer of duct tape or HVAC tape around the joint to securely hold the position of the vent/duct pipe with fan housing.
- But If your fan has a separate duct connector then connect it by the instructions given on your exhaust fan kit and follow the same procedure.
- Make sure the proper alignment of the duct pipe to improve airflow.
Step# 4 Connect the Wiring:
- Open the junction box on the side of the housing and pull out those wires that connect with the old fan housing.
- Connect those wires with the fan housing to the same colors such as yellow to yellow, blue to blue etc in your ceiling or attic that run with the old fan.
- Place the wires together and wrap them with a plastic connector to join.
- Push the wire connection back into your fan housing and close the junction box as you open it.
- If your fan has a standard plug instead of wires, then just plug it into the outlet in your attic.
Step# 5 Attach the Grill:
If your fan grill has any screws then drive these screws with a drill or screwdriver to secure it. But if not have, then place the cover/grill in position and just push it from below until it clicks into the place.
Step# 6 Test the Fan:
Now turn on the power back to your fan and open the switch to test that everything works perfectly or not. But if the fan is not working well, then again turn off the power and open the fan to check your work and make sure that you’ve installed it properly. If you’re unable to understand or inspect the issue then call the contractor or electrician to solve your problem.
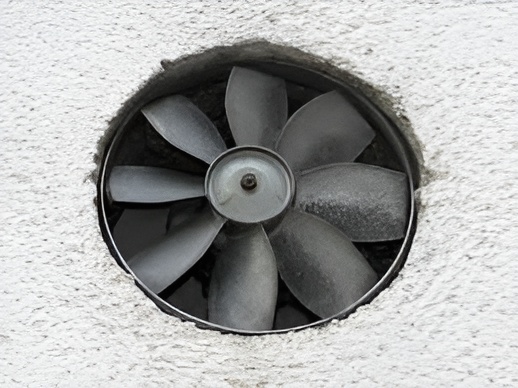
Common Mistakes to Avoid When Installing or Replacing Your Exhaust Fan:
Improperly seal the connections of wire and duct with fan housing.
Skip any safety measure like goggles, mask or remaining power supply on.
Choosing the wrong fan size or type for your bathroom ceiling.
FAQs About Bathroom Vent Fan:
1. Can I replace a bathroom fan myself?
If you’re aware of simple wiring techniques and able to stand on a ladder for more than one hour, you can easily install or replace your bathroom vent fan with proper steps and guidance.
2. How long does it take to replace a bathroom ceiling fan?
Replacing a bathroom vent fan is a long process and it takes more than 2 hours based on your experience with DIY projects and skills or with wirings. Usually an experienced electrician can easily replace it in 1 and a half hours.
3. Do I need an electrician to replace a bathroom exhaust fan?
Yes, you may need a licensed electrician for your bathroom vent fan replacement, if you’re installing completely a new vent fan into your bathroom, you should hire a professional.
4. Do I need a permit to install a bathroom ventilation fan?
Basically, it depends on the location where you’re living. However if you have a permit for your existing bathroom vent fan then it is not necessary to take a permit, but if you’re installing a new one then you should require a permit according to your location.